How To Deep Clean Your Home Step by Step

Once winter has passed and summer is on the way, it’s time to think about a deep clean for your home. Deep cleaning at least once a year is so important because it gets your home in order so you’re ready for the year ahead. Your standard weekly cleaning is important for maintaining your home, but a deep clean house gives you a good base to work from.

Deep home cleaning is a big job to take on, but if you break it down into smaller jobs and get organized, you can make sure that you hit all of the important areas in no time while leaving your home cleaner than ever. This room-by-room breakdown will make sure you don’t miss anything and you can get your deep clean finished in no time.

Bathrooms

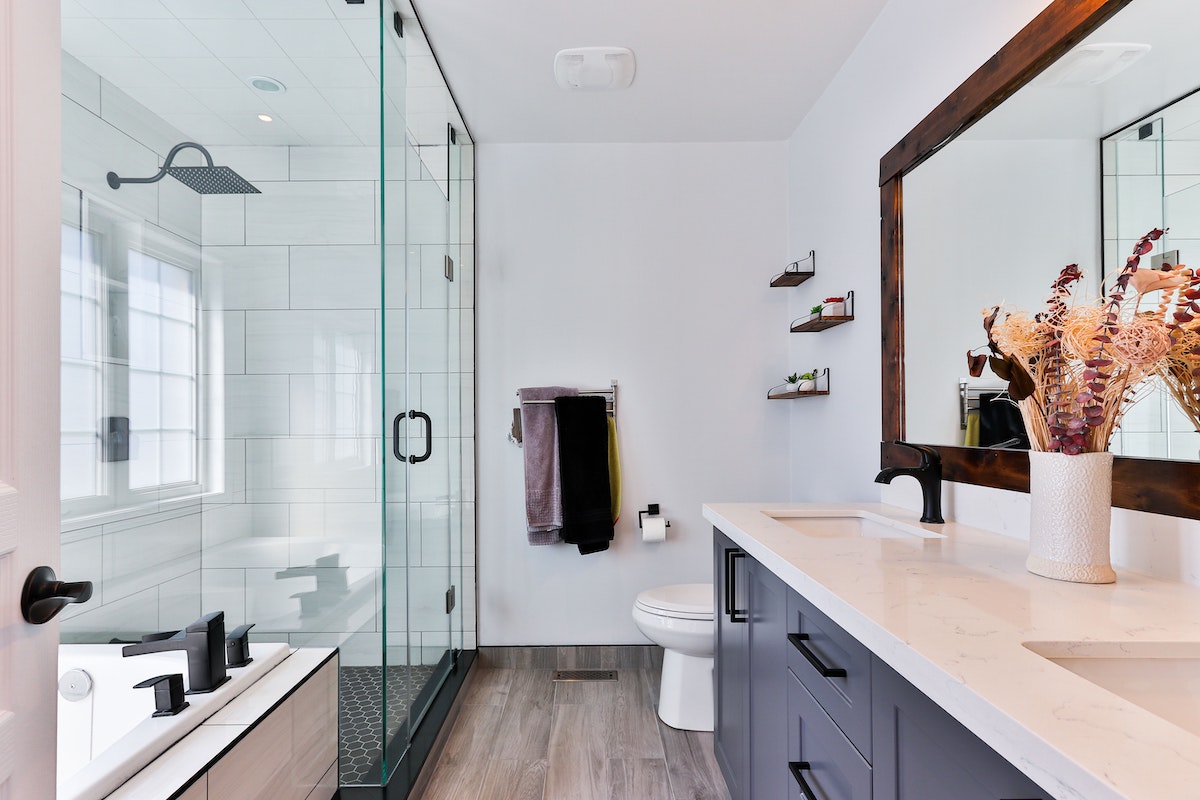
The bathroom is always a good place to start because they’re most likely to harbor bacteria, and they don’t take too long to clean. The main jobs you need to complete are:

  • Dusting light fixtures and clearing cobwebs
  • Cleaning bath, shower and toilet
  • Washing mirrors and other surfaces
  • Cleaning blinds
  • Washing or replacing shower curtains

Tackling limescale is a very important job when cleaning the bathroom. If you let it build-up, it is far harder to get rid of. Use a limescale remover spray around the bath and shower particularly on the taps. If there is a lot of limescale around the showerhead, you should take it off and put it in a plastic bag with some water and vinegar. Leave it to soak for about an hour and the limescale will come right off.

If your taps and other fixtures are looking a little dull, bicarbonate of soda and lemon juice will bring the shine back. Mix them together into a paste and use it to buff the taps. After a few minutes, clean it off and they will look good as new.

Kitchen

The kitchen is another area that you should prioritize because you prepare your food there. Important cleaning tasks include:

  • The tops and inside of kitchen cabinets
  • Move appliances and clean floors behind them
  • Vacuum around the refrigerator coil
  • Wipe down appliances and countertops
  • Window treatments
  • Clean sink

When cleaning the cabinets, use the opportunity to take everything out and sort it as you put it back in, throwing away any out-of-date food in the process. That way, you kill two birds with one stone. You could even create a list of everything in the pantry so it’s easier to keep on top of things.

If you notice any bad smells in the fridge, you should leave a few slices of lemon in there. This will soak up any odors and leave the fridge smelling fresh.

Bedrooms

Creating a relaxing bedroom environment is important as it helps improve your sleep patterns. These are the main cleaning jobs you need to do in the bedroom:

  • Dust around all knick-knacks, on bedside tables, behind the headboard and on ceiling fan blades
  • Strip beds and wash linen
  • Clean underneath the bed
  • Flip or rotate mattresses
  • Clean window treatments
  • Organize your closets

Use your deep home cleaning as an opportunity to declutter in the bedroom too. When sorting through your closets, be realistic about things that you actually wear and if you haven’t worn something for a long while, donate it. Go through the drawers in your bedside tables too and get rid of things like old phone chargers.

Linen Closet

A well-organized linen closet makes life a lot easier for you when doing your standard home cleaning during the week. Complete these key tasks during your deep home clean:

  • Remove all items and wipe down shelves
  • Vacuum the floor
  • Reorganize everything

Any linens that are at the back of the cupboard and don’t get used that often should be washed. Even though they haven’t been used, they still develop a musty smell when they are stuffed at the back of the cupboard.

Laundry Room

If you have a separate laundry room, you need to clean and reorganize it during your deep cleaning routine. Complete these simple tasks:

  • Wipe down washer and dryer
  • Vacuum the floor
  • Throw out odd socks and old detergent containers
  • Reorganize the space

When reorganizing your laundry room, you should consider adding a container for any bits and pieces you find in pant pockets. That way, if somebody in the family has lost something, they know where to look. Setting up separate hampers is a good idea if people in the house do their own washing. It’s also a simple way to separate your whites and colors.

Mudroom

The purpose of a mudroom is to get dirty, but that doesn’t mean you should miss it off your deep cleaning rota. These are the main task you need to do:

  • Put away off-season clothes and footwear
  • Declutter the area and wipe surfaces down
  • Reorganize the space

Good storage is essential if you want to stay on top of clutter in the mudroom. A shoe carrier that hangs over the back of the door is perfect. Hooks on the wall are a simple but effective way to add more vertical storage too. A small hamper next to the door is perfect for wet gloves and socks too.

Living Areas

The common living areas in your home usually get a good clean during your normal routine, but there are still a few deep cleaning tasks you need to do:

  • Declutter the room
  • Dust surfaces and vacuum cobwebs
  • Clean furniture and lampshades with the upholstery attachment on your vacuum cleaner.

If your carpets and soft furnishings are quite old, you should also consider calling in a professional cleaning service to give them a deep clean.

Outdoor Areas

Don’t neglect the outdoor areas of your home during your deep home cleaning either. Important tasks include:

  • Sweep the patio areas and decking
  • Store out of season decorations
  • Wash the upholstery on outdoor furniture

If you have decking, you also need to stain it again to protect it from the elements. Your patio may also benefit from a deep clean with a pressure washer too.

If you follow all of the steps on this checklist, you can give your home a full deep clean and get ready for the year ahead.

Need help with your deep clean?

Allow our team of experienced technicians to help with your deep clean. Imagine everything else you could do with the extra time you will have by allowing us to deep clean your home. Don’t wait any longer and click here for your free quote!

Submitted by adminHelpro

Related Posts

How to Clean and Disinfect a Fabric Couch

Owning a fabric sofa not only adds a nice style to your space but it is also comfy. Knowing how to clean a fabric couch is essential to making sure it lasts for many years, especially if you have pets or little ones.

We are going to tell you how to treat stains, understand the cleaning codes, and maintain your fabric couch.

Cleaning Codes for Fabric Couches

On your couch, there are tags, usually found under the cushions. On those tags, there are what seem to be random letters, but those are actually cleaning codes. We created a table below to show you what each letter means and what you can use to clean it.

Cleaning Code Meaning
W “Water-based cleaners”. Only use a cleaner with water as its main component.
WS “Water-based and solvent cleaners”. It’s safe to use both water-based and solvent-based cleaners on your fabric couch.
S “Solvents”. Only use a cleaner that uses cleaning chemicals as its main component.
X “Vacuum only”. Do not use any liquid-based cleaners on your fabric couch.

How to clean fabric sofa stains

We will walk you through a step-by-step guide on how to clean fabric sofa stains to ensure your couch lasts for many years to come.

  1.  Treat the stain as soon as possible. As soon as something spills on your fabric couch, make sure to blot it with a microfiber cloth or paper towel right away. Waiting too long will cause the stain to settle and will make it much harder to get out.
  2. Check the manufacturer’s recommendations and cleaning codes. Before you begin to clean the stain with a cleaner be sure to look at the tags usually found under the cushions. Refer to the cleaning codes chart above.
  3. Vacuum your couch. Before you start using cleaning agents be sure to vacuum up any loose dirt that may be on the surface. You don’t want to be scrubbing dirt into the stain.
  4. Spot treat with the recommended cleaning agent. Use a microfiber cloth that won’t bleed color and dampen it with the recommended cleaning product. If you are unsure about the cleaning agent, be sure to test on a small area where you or guests won’t see it.
  5. Dry the cleaned area. Once you have blotted the stain with the cleaning product use a dry microfiber cloth and continue to blot the area, soaking up the dampened area.
  6. Let your fabric sofa dry. Let your sofa air dry or if you have a small fan, point it towards the damp area to speed up the drying process.


How to steam clean a couch

If the tags on your couch are marked with a W or WS you may be able to use a steamer to give your couch a deeper clean. Before you take a steamer to it, make sure to read over the manufacturer’s instruction booklet. Even though it may say W or WS the fabric may not be able to withstand the heat of a steamer, causing you to damage the fabric.

If you are in the clear and can use a steamer on your couch, see below for a step-by-step on how to steam clean your couch.

  1. Vacuum first. Before you steam your couch make sure to get any excess dirt on the surface with a vacuum cleaner.
  2. Circulate the air inside your home. Make sure you steam your couch on a clear day so you can keep your windows open while you steam. This will allow for the air to circulate and prevent moisture buildup which could leave residue behind.
  3. Spot test first. Before you start steaming your couch in areas where noticeable, make sure to test on the back or on the inside of your sofa’s skirt. Preventing any unwanted damage.
  4. Let your fabric couch dry. After you have steamed your entire couch, you can either let it air dry or you can point a fan at the couch to allow for faster drying.
  5. Vacuum the surface. Make sure your couch has dried completely before vacuuming the surface. Vacuuming after steam cleaning will pick up any loosened dirt the steamer brought to the surface.
  6. Enjoy your clean couch. Now it’s time to enjoy your clean and fresh couch!


How to disinfect a couch

We spend a lot of time on our sofas and rarely think about disinfecting them like we do other areas of our home. After routine cleanings of your fabric couch, it’s always a great idea to use a disinfecting spray such as Lysol to kill any germs lurking inside the fabric.

Prefer to use a homemade, natural disinfecting spray? See the steps below.

  1. Use a clean and empty spray bottle.
  2. Use a natural oil known for its disinfecting properties such as tea tree oil, lavender, lemon, orange, eucalyptus, rosemary, cinnamon, thyme, peppermint, and geranium. Choose the scent you like best.
  3. Fill your spray bottle with 10oz isopropyl alcohol. Use at least 70% alcohol for this to work well.
  4. Add ½ teaspoon of hydrogen peroxide.
  5. Add between 90-100 drops of your choice of natural oil.
  6. Shake well to mix all together and begin spraying your fabric couch.

Keeping your fabric couch clean is key to being able to enjoy it for many years to come. Plus, keeping it disinfected will help prevent illness within your household. Now you can get back to watching your favorite movies or streaming your favorite shows.


Need a helping hand with cleaning your home?

Our team at Helpro is committed to providing the best cleaning service there is in Orlando. Whether you need house cleaning services or janitorial services, we pride ourselves on being on time, every time, and having strong attention to detail. Click below to get your free quote today!

GET YOUR FREE ESTIMATE TODAY

Submitted by adminHelpro

Related Posts

How to Clean a Glass Top Stove Easily

In this post, you will learn how to clean your glass top stove and how to keep it clean at all times, without scratching it. Making it look like a brand-new stovetop again.

Owning a glass top stove definitely adds a cool and sleek look to your kitchen. However, since you own one, you realize how hard it can be to keep spotless. When we clean people’s homes, they often tell us they can’t get stubborn burn marks off the burners or they can never seem to get it to look like new again!

Checklist Before Cleaning Glass Top Stove

We know that you are eager to just get started and wipe those stains or burn marks away, but keep the following things in mind before cleaning:

  1. Make sure it is cool. This might be obvious, but never clean your glass top stove surface is still hot.
  2. No heavy chemicals. You don’t need to take out your most aggressive cleaning products when cleaning this type of surface. You won’t want any residue left behind, and it might not be good for your health to breathe in those chemicals when cook after cleaning it. Also, stay away from abrasive steel wool pads or sponges as this will scratch your stovetop.
  3. Check the instruction booklet. Depending on the manufacturer of your stove there may be certain products they recommend you use. You won’t want to void any factory warranties because you used the wrong cleaning product, and it ruins your sleek glass stovetop.
  4. Keep it soft. Most glass stovetops are pretty resistant to scratching, but as we said above, stay away from scouring pads, scrub pads, or steel brushes. Stick to the softer side with microfiber cloths or sponges. Using a razor blade is one exception, but we will go over that in detail shortly.


Best Daily Cleaning Tips for Glass Top Stoves

Keeping your stovetop clean comes with regular cleaning after each use. Once the stove has cooled down from cooking, it’s best to wipe down your stovetop to prevent residue from building up.

Below are the tools you will need for regular daily cleaning:

  • A spray bottle of water or distilled white vinegar
  • Microfiber cloths

Now, these are the steps we recommend you take in order to maintain your stovetop after each use:

  1. Let the stovetop cool down.
  2. Spray the top with water or distilled white vinegar.
  3. Wipe the liquid away with one of the microfiber cloths.
  4. Buff any streaks out with a dry microfiber cloth.

This prevents any buildup from happening which usually leads to very tough burn marks that seem to never come up.


Best Cleaning Tips for Dirtier Glass Top Stoves

Every two weeks or once a month you will want to take your cleaning a bit further and be a little more thorough. We put together the best way to do a deep clean on your stove to ensure it remains looking new at all times.

Below are the tools you will need for a biweekly or monthly deep clean:

  • Baking soda
  • A spray bottle of distilled white vinegar
  • A clean towel
  • A clean bucket filled with hot water
  • Microfiber cloths

We recommend the following steps to complete your deep clean:

  1. Let your glass top stove cool down and spray the surface with the distilled white vinegar.
  2. Take the baking soda and sprinkle a generous amount over the vinegar you just sprayed, make sure to cover most of the stovetop.
  3. Take your microfiber cloth, dunk it in the bucket of hot water, and ring out the excess water.
  4. Place the towel over the baking soda and vinegar, covering the stovetop.
  5. Let sit for about 10-15 minutes.
  6. Remove the towel, take your microfiber cloth and wipe away the excess baking soda and vinegar.
  7. Spray the stovetop again with vinegar and use a dry microfiber cloth to buff out any residues left behind.
  8. Repeat the steps above as necessary until your glass top stove is clean.


How to Remove Burnt-On Grease from Stove Top

If your glass top stove has burnt rings around the burners that just don’t seem to come off or it seems like there is a glue-like substance stuck to the surface, then this section is for you. When done properly and carefully a razor blade will become your stove top’s new companion for as long as you own it.

Below are the tools you will need to remove the burn marks from your stovetop:

  • A razor blade that comes with a holder to keep your fingers safe
  • A spray bottle with distilled white vinegar
  • A clean microfiber cloth

We recommend the following steps to get those stubborn marks off:

  1. Before you start scraping away, make sure to check the manufacturer’s instructions booklet. Sometimes they ask you don’t use razor blades on the surface. If you can’t find your booklet, it can usually be found on the manufacturer’s website.
  2. Make sure that the stovetop is cooled down completely before starting this process.
  3. Spray the distilled vinegar on the areas where you have burnt on grease or residue.
  4. Take the razor blade, hold it at a slight angle, and gently start to scrape under the burnt-on residue. Keep in mind to never use the edge of the razorblade as this could scratch the glass top stove.
  5. Take your microfiber cloth and wipe away the lifted residue.
  6. Repeat the above steps as many times as necessary until your glass top stove looking like new again.

At Helpro we treat every home we clean as if it were our own. Never cutting corners and always having strong attention to the details.

Whether you need a little help around the house after a special event or you just need some help with routine cleaning, we have your back. Contact us today to get your free quote.

Submitted by adminHelpro

Related Posts

Why Your Cold Keeps Coming Back

Do you feel like you constantly have a cold or are getting sick? Well, your car might be to blame. See below on why your car may be making you sick.

The average American spends around 40,000 hours in a car during their life. So it only makes sense to keep it as clean as the interior of your house to keep sickness and allergies away.

Shake out mats regularly

The floor of your car is inevitably going to get dirty really quickly just from peoples’ shoes. If you shake your mats out regularly, you can go longer in between vacuuming.

Clean out cup holders

Cup holders can get gross pretty quickly from the bottoms of cups sitting in them, or even because they are a great little place to store trash. Throw away your drive-through drink as soon as you get out of the car so that the condensation doesn’t build up and drip down to create sludge.

Clean seats

If you have kids or pets, chances are the seats in your car have stains on them along with a healthy dose of hair, dirt, and crumbs down in the cushion seams. A few spritzes of water and a squeegee will pick up pet hair from your upholstery. Use an old toothbrush to get everything out of the cracks, and a magic eraser for stains or sticky things on vinyl or leather.

Clean Air Vents

To prevent build-up, keep a foam brush in the car to clean in between the crevices. Do this every two weeks.

Follow these simple tips and you’ll be amazed at how your car can stay clean and fresh for longer.

Submitted by adminHelpro

Related Posts

Why Sanitizing Leads to a Healthier Home

Below we will go over why regularly sanitizing and disinfecting your home will lead to a much healther and happier home.

Cleaning means removing any dirt, dust, or debris from a surface. Sanitizing makes a surface free of contaminants and reduces – not kills – bacteria and fungi. Disinfecting means to “kill” viruses and bacteria by 99.9 percent. So it is recommended that you clean low-risk surfaces such as floors and windows, sanitize all surfaces that might be in contact with food such as kitchen counters and dining tables, and disinfect all frequently touched surfaces like doors, handles, cell phones, remotes or where particular viruses, molds, and bacteria are prone to grow like bathrooms.

Cleaning will always contribute favorably to your indoor health because allergens and microorganisms are being removed from the surfaces of the indoor environment but there is always the risk of cross-contamination.

So next time you are cleaning remember this: always begin with cleaning and then – depending on the part of your house you are cleaning – follow to sanitize and disinfect. Clean your floor and windows; sanitize your kitchen and dining room and disinfect your bathrooms, door, handles, phones and anything that you touch frequently. Also if any member of the household is sick make sure to disinfect your kitchen and dining room too.

With these tips, you will keep any viruses and bacteria away from your family and you will have a healthier home.

Submitted by adminHelpro

Related Posts

How to Clean Your Mattress Like a Pro

Have you ever thought about how much dirt and sweat your mattress collects?

If we were to sleep every night for a whole year on our beds, we would be sleeping on our mattress 365 times per year, around eight hours each night. And an average mattress can last around 7 years, so doing quick calculations could mean that you would be sleeping 2,555 nights on the same mattress!

Do you ever think about what could be collecting inside of your mattress?

Most of us don’t think about cleaning our mattress, even though we use it every night and for the occasional power nap. Mattresses need to get a deep clean and washed as we do with our linen and favorite pajamas.

But how should you clean a mattress? And how often?

There are small DIY hacks to clean your mattress that will take away stains and even odors that just don’t seem to go away.

If you want a dirt and residue free mattress you will need the following items:

  1. 450 grams of baking soda
  2. Essential oils
  3. Vacuum cleaner

Here is how to deep clean your mattress

  1. Open the box or bag of baking soda and add 10 to 20 drops of essential oil (Sandalwood, Lavender or Chamomile work great and are antibacterial). Close the box/bag and shake it so the oil spreads and large clumps are broken.
  2. Sprinkle the whole box/bag of baking soda over the bed. Now start rubbing the baking soda mixture into the bed for a couple of minutes, especially on those areas where you see stains. Let the baking soda and the essential oil sink in and work the magic for at least one hour. This baking soda mixture will not only freshen your bed but it will also lift dirt, residue and eliminate moisture.
  3. After the hour is up, vacuum the mattress (remember that your vacuum hose must be clean of dust so no dust stain is left on the mattress). Work slowly to ensure all the baking soda is removed. By vacuuming your mattress you will suck away dust mites.
  4. Make the bed and get ready for bedtime!
  5. Repeat this process at least every 4 months.

Some extra tips:

It’s a great habit to rotate your mattress every six months to extend it’s life and prevent sagging, if its a two-sided mattress. Also, you will need to clean your mattress on two sides. Rotate it before doing the deep cleaning.

Now that you have learned how to clean your mattress, don’t forget to wipe down the walls and bedframe!

We didn’t say doing a deep cleaning on your mattress would be fast and easy, but it works! However, you will need at least two hours to get the job done.

Need a helping hand?

Helpro Cleaning Services and our professional technicians will clean your mattress in no time. Request a free quote here!

Submitted by adminHelpro

Related Posts